
I have been wanting to make the time for this FOR AGES! Finally, last Sunday it was time. My frustration levels at never being able to find anything in my actually quite small handbag had hit an all time high!
Necessity is the mother of invention so they say….
So here is my purse insert. This is a bag to go inside your handbag. It has pockets (the right size for MY things!) so I can always find something when I need it.

And even better, it can be moved between handbags of similar (or larger) size, so YAY! The handles easily fold into the outside pockets when actually in my handbag, so they don’t get in the way. But useful for grabbing the whole purse insert out to move to another bag.

This was the first time I had tried to make this, so I called it my ‘prototype’ to take away the pressure for it to be perfect. So I could try it out and see what works, what didn’t, what needed to be tweaked etc etc.
Now this isn’t going to be a tutorial, because everyone’s handbags are different sizes, and you will need to have different things in them! But I will give you some outlines of how I put it together if you want to have a go for your own handbag.
I started with (4) rectangles that were the length of the inside of my handbag and as high as I wanted it to be. For me that was 11″ x 6″.
Stiffen with an interfacing on the wrong side.
I then made two pockets for each outer side of the purse insert. Basically by sewing two pieces of fabric right sides together, leaving a gap. Turning out. Pressing. Top stitching the ‘top’ of the pocket. Then top stitching the rest of the pocket onto the outer panel.

I use these outer pockets for smaller/lighter things such as my train ticket, panadol etc.
To create the inside pockets I cut (2) rectangles about 18″ x 5.5″ from exterior fabric and stiffened those with interfacing. Then cut (2) 18″ x 5.5″ from interior fabric (no need to interface that).
Sewed these right sides together along one long side which will become the top of the pockets. Press and top stitch.
Now comes the laying out of everything you want in your handbag and working out how large a space/slot/pocket you need for them.
As you can see, I had a LOT of things I wanted to carry! (someone on Instagram said she was sure she saw a mini kitchen sink in there!) : )
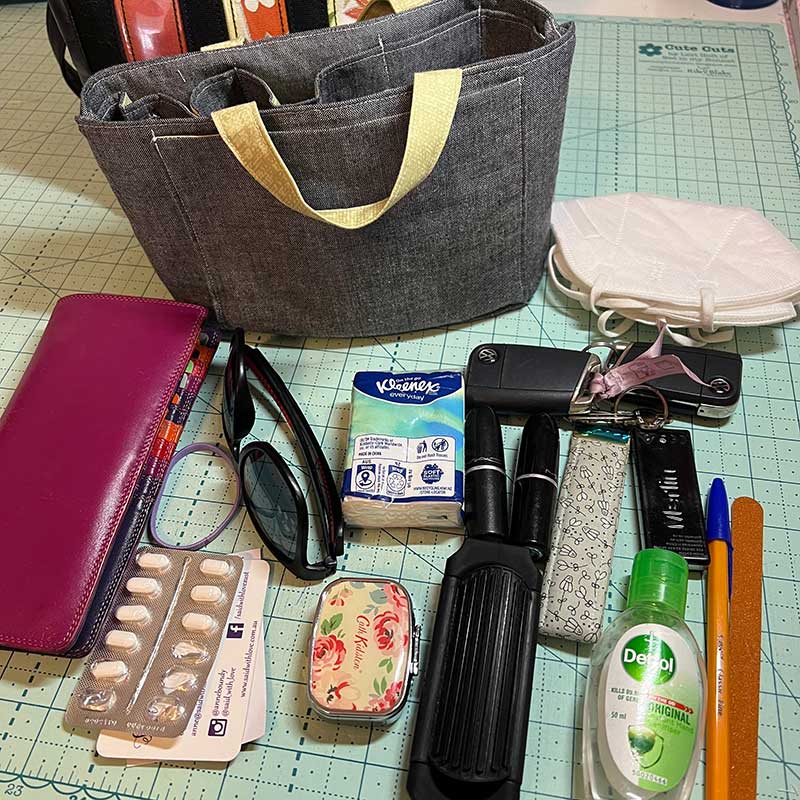
I measured the larger things first. I needed a pocket for my phone, one for my actual purse.
(now that I am actually using the prototype I have decided my purse is going in the middle not in a particular pocket and my phone slips in between the purse insert and my handbag, so also doesn’t need a special pocket!)
But I originally made a pleated pocket (on the left with two pleats in it) and the second pocket had a central pleat for them.
I then started attaching the pocket piece to the backing piece (one of the original 11″ x 6″ pieces), stitching well at the top of the pockets.
The two smaller pockets I actually made shorter as well, as I couldn’t get my lipsticks out of them if they went all the way to the bottom!
I had fabric to trim off (I didn’t use the whole 18″ in length)

I then decided half way through the second side that doing the pleat pockets was a bit of a waste of time and just gave the pocket some extra ‘ease’ (note the gathers at the bottom). These pockets work the best!

I then created a template for the base (not easy!) but it was sort of an oval. I cut two including a generous seam allowance.
Sewed one of them into the base of the purse insert (that would be seen from inside) and then hand stitched the outer one. I couldn’t find a better way to do that. It works, and that bit isn’t seen thank goodness!
So I am loving it! Will probably make another one and incorporate all the things I learned along the way, as well as tweaking the sizing a bit.
But there is SO much less swearing in the house now when I need to find something in my handbag!
Let me know if you have ever made a purse insert!


