
If you follow me here on my blog or on Instagram (@anneboundy or @said_with_love) you will know I LOVE double sided quilts 🙂
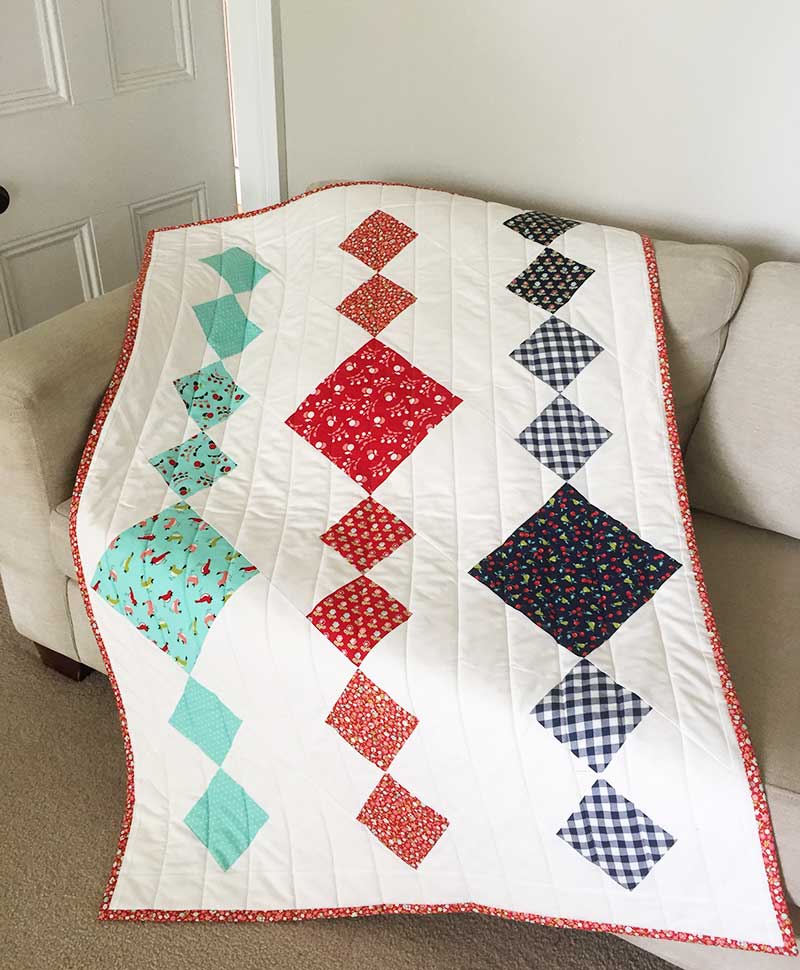
This quick, simply constructed quilt uses-almost-all-of-a-charm-pack and the back uses a couple of spare layer cake squares 🙂 I have called it the Hanging Lanterns Quilt Tutorial. Enjoy!

Size: 39” x 56” A cot size quilt or tummy time floor quilt.
Materials for Hanging Lanterns Quilt:
1 charm pack (we use 36 charms out of the 42)
2 yards of background fabric:
5 strips of 5” x WOF sub-cut into:
18 – 5” squares
15 – 5” squares cut in half diagonally for the setting triangles around the edges
9 strips of 4.5” x WOF sub-cut into:
70 – 4.5” squares
2 – 4.5” squares cut in half diagonally for the corners
Binding
Backing – 1 ¾ yards x WOF or you can make the alternative backing below for a double sided quilt!
Wadding – 1 ¾ yards
Thread
How to Make your Hanging Lanterns Quilt
Open up your charm pack and put aside up to 6 charms that are too close in colour to your chosen background fabric.
I decided to have a hanging lantern (aka column) of each colour however that may not be possible with all charm packs.
Select out 18 charm squares to be your feature fabrics. (3 from each colour way if you are having one column per colour) These need to be trimmed to 4 1/2″ square.
Select 18 charm squares to be your four patch blocks. (3 from each colour way if you are having one column per colour) One charm square is going to make two 4 patch blocks.
Make the Four Patches
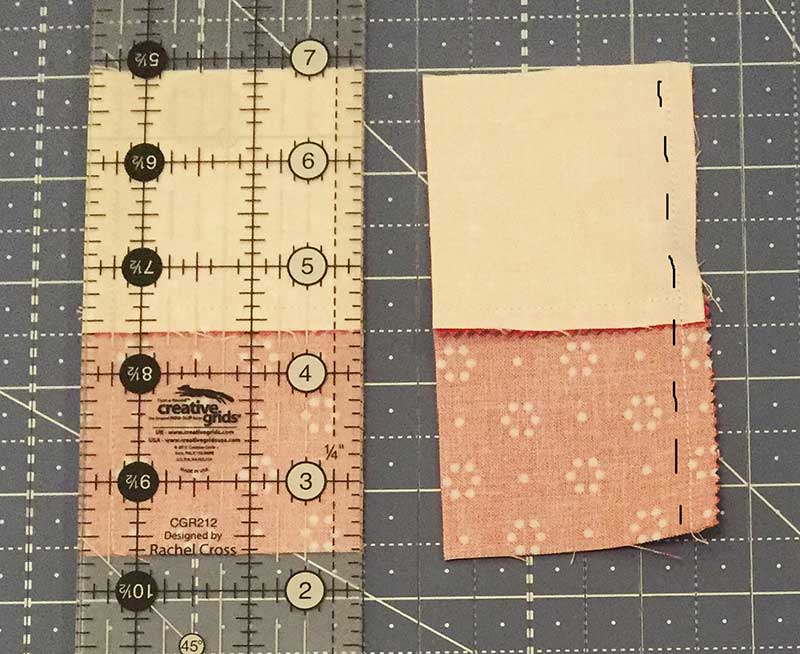
Place a 5” coloured charm square right sides together with a 5” background square and sew a 1/4″ seam down opposite sides.
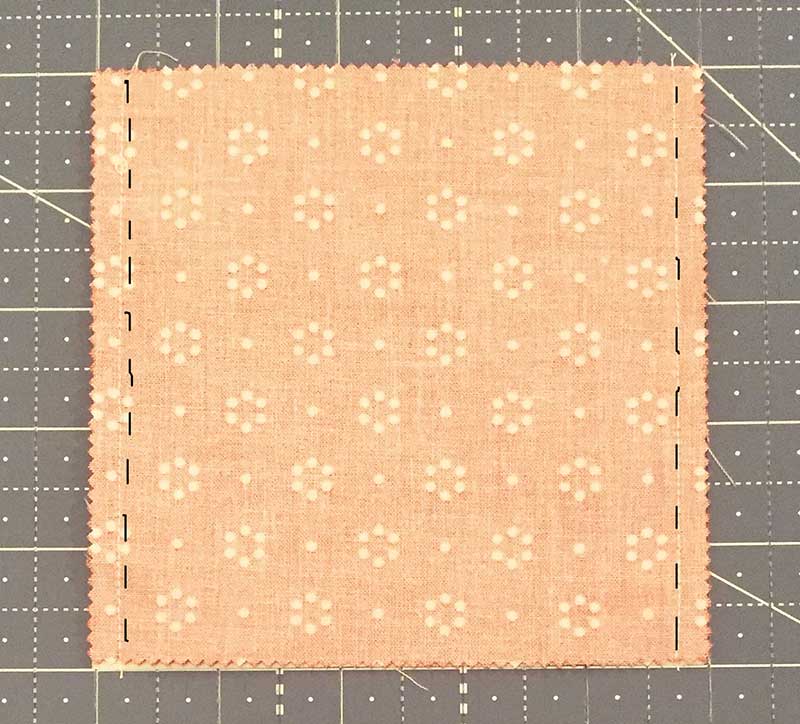
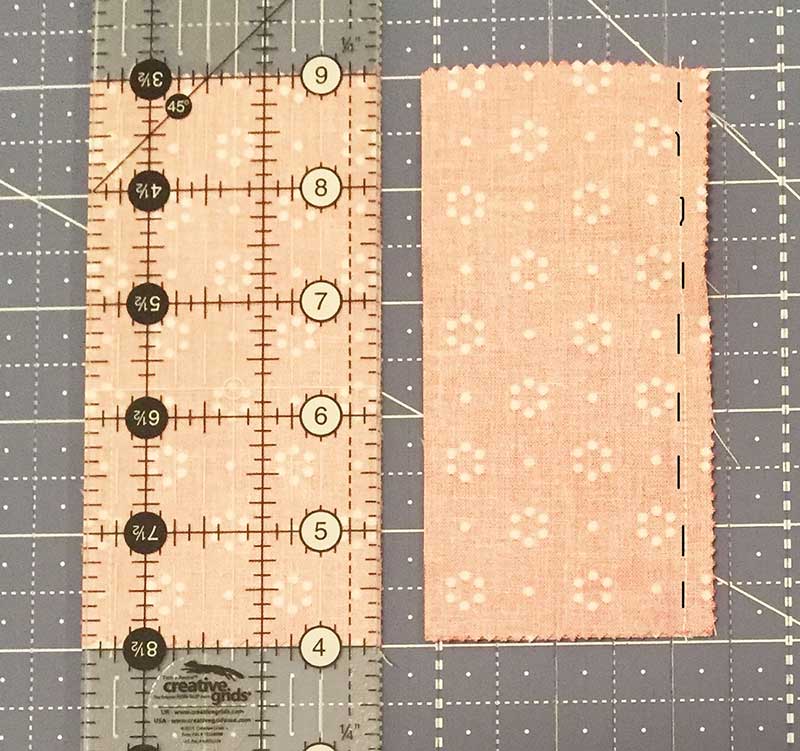
Cut down the middle (ie at the 2 1/2″ mark) so you have two rectangles. Open and press the seam to the dark side.
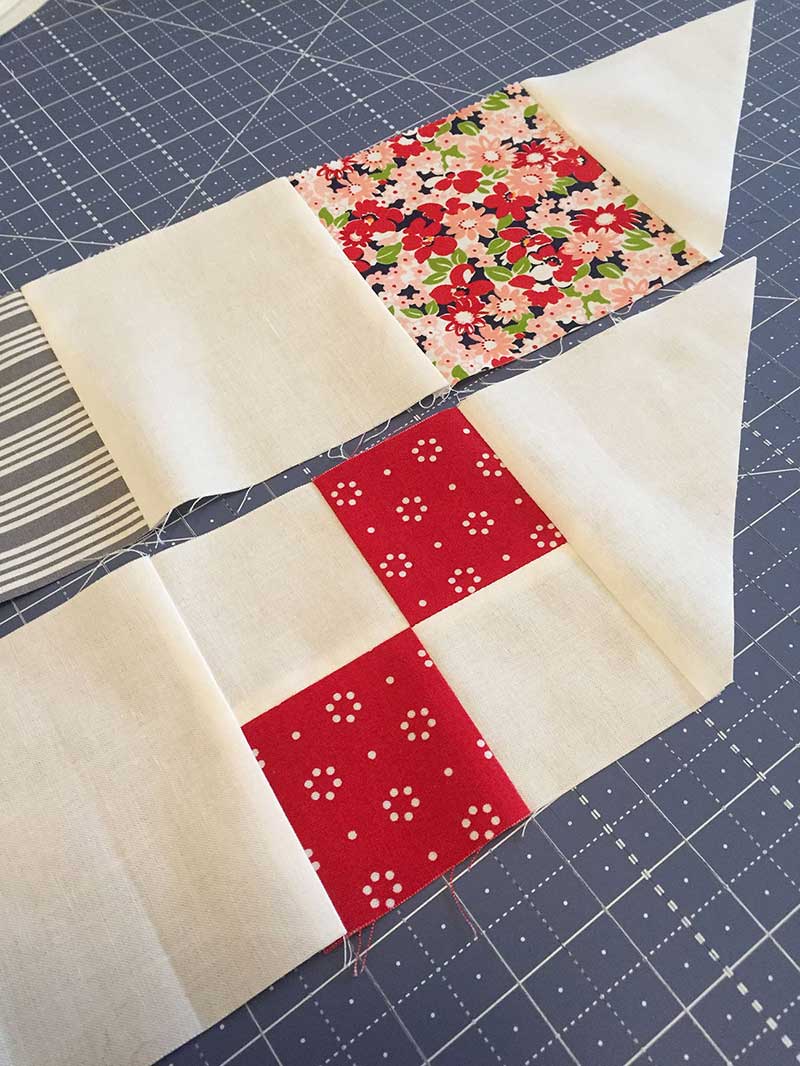
Then put these two pieces right sides together with the coloured side on top of the background fabric side.
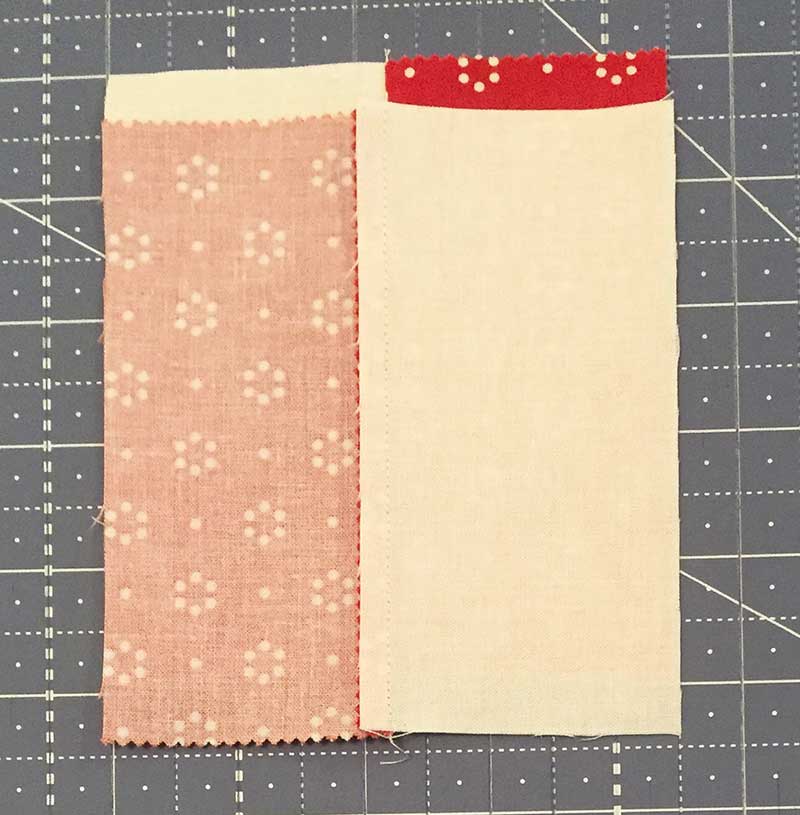
Nest your seams and then sew along the top and bottom with a 1/4″ seam – ie sew along the sides with the nested seam in it.
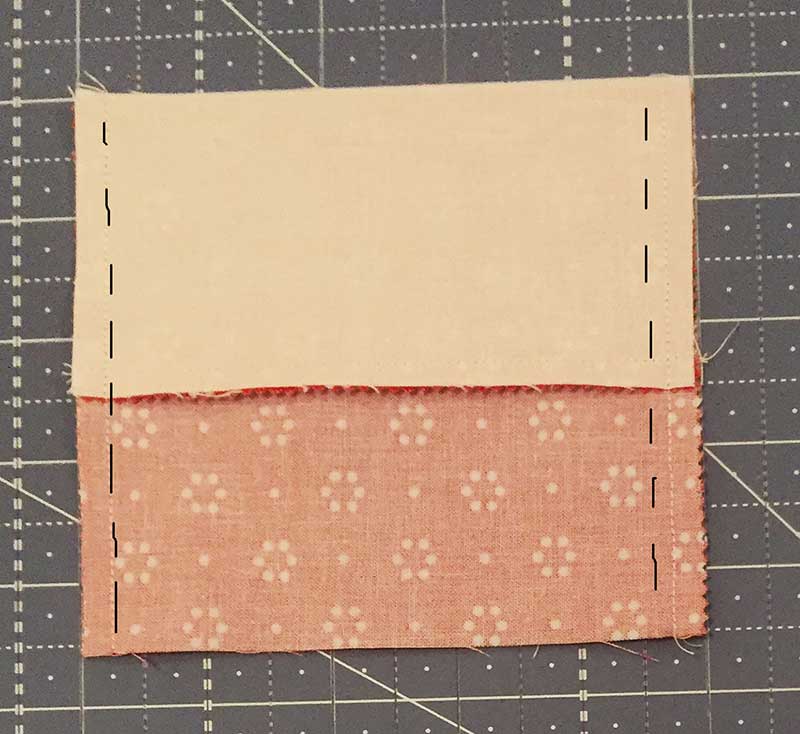
Cut down the middle (ie again at the 2 1/2″ mark) so you have two rectangles. Open and press the seam open (to save on some bulk).
These will make your two 4 patch blocks. They should finish at 4.5” square.

Front Layout Construction
Then layout your quilt on point with a solid print and then two 4-patches then a solid print in each column. Place the background 4 1/2″ squares in between.
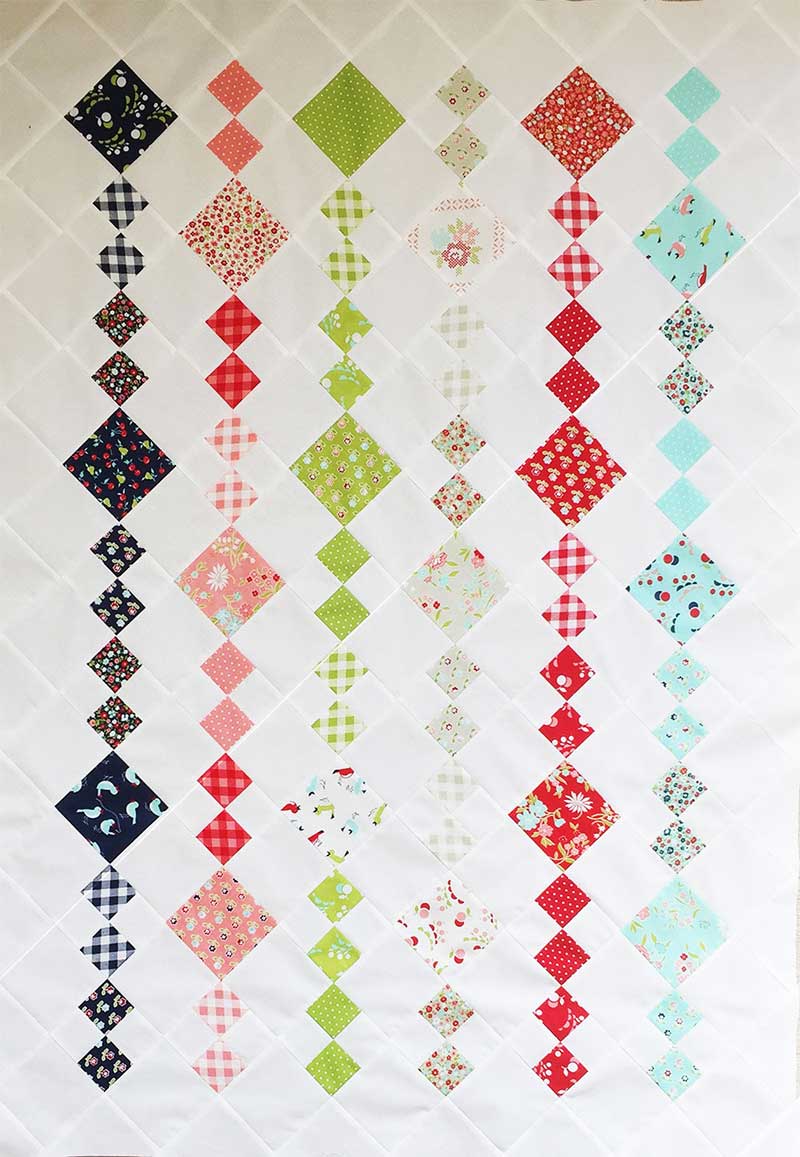
Once you are happy with your layout, sew the diagonal rows together across the quilt.
Then we need to add to the end of each of the rows the triangles we have cut out. These will square up the quilt to make your rectangle.
Trim 1/4″ away from the points on all sides and then add your binding.
Alternative Backing
I love making double-sided quilts, I mean why have a dull back when it can be just as wonderful as the front? For the Hanging Lanterns Quilt Tutorial I echoed the design from the front using 10” layer cake squares instead of 5” charm squares.
Materials for the alternative back:
3 – 9.5” squares in print
5 – 10” squares in print (or six, two from each colour way if you are doing a column of each colour like me. You will have some left over 4-patches)
5 – 10” squares in background colour (or six, if you are doing a column of each colour like me.)
6 – 9.5” squares in background colour
10 – 10” squares in background colour cut diagonally in half for setting triangles around the edges
2 – 9.5” squares in background colour cut diagonally in half for corners.
2 – 5” x WOF strips for border strips on either side
2 – 7” x WOF strips for border strips on top and bottom
Alternative Back Instructions
Put each 10” square print right sides together with a 10” square background colour and make the 4-patches in the same method as above. You will use nine 4-patches in the alternative back.
Place out the 4-patches with the square prints and backgrounds as per the image below.
Then place the setting triangles at the end of each row as per the instructions for the front and the corner triangles in each corner and once you are happy with your layout, sew the rows together.
Add a border strip to the top and bottom and then add a border strip to each side of the quilt.
These borders will make your alternative back wider and longer than the front.
Take your time when basting to ensure your back lines up well with your front.
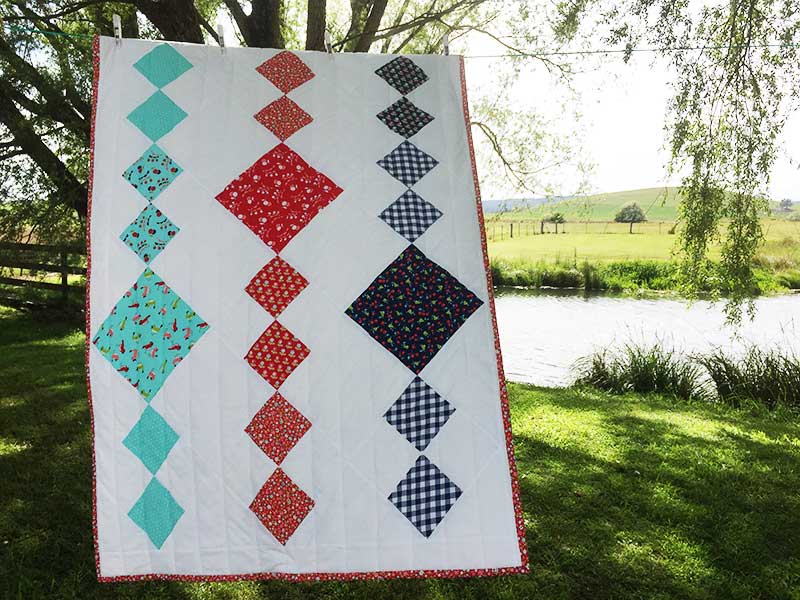
Quilting
I quilted it with some basic straight lines down the quilt and voila… one quilt finished and it was quick, fun and cute!
I hope you love the quick and easy Hanging Lanterns Quilt Tutorial!


What a stunning quilt and thank you so much for linking up with the Tips and Tutorials Festival!
Thanks for hosting the Festival Yvonne 🙂