Moira (@quilttalking on Instagram) has created a great new pattern that is Fat Eighth friendly and she asked if I could make a sample for one of the shops that will be stocking her patterns.
She had made the original quilt out of Heartland Fabrics by Pat Bravo Design for the Art Gallery Look Book and I just loved how the pattern made the fabrics shine! Lots of pieces large enough to see the detail of the different fabrics.
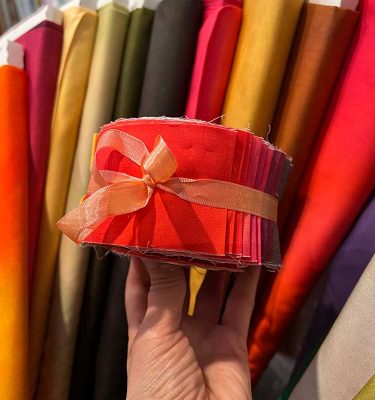
When the fabrics arrived they were even better than I had imagined and seen online 🙂 What is it about feeling the fabrics that make them come to life? And those owls! and the trees…. and that soft floral (which I have enough to make the backing out of!!)

Art Gallery fabrics are so soft and blocks made with them iron up beautifully and crisply. I love them. Doesn’t hurt that there are so many wonderful designers working with Art Gallery these days 🙂
As I looked closer at the fabrics, there are definitely some directional prints that I had to take into consideration when cutting. And I spent quite a bit of time trying to decide the background fabrics… I was very tempted for Amy Sinibaldi’s Paperie text, but in the end decided that Moda Bella 97 showcased the fabrics better.
 Luckily they had sent me Fat Quarters instead of Fat Eighths, so I had some wiggle room when it came to cutting (and making a few little oopses along the way!).
I decided that I wanted to put the pinky fabrics in the centre, then with a ring of the more mustardy/yellow fabrics and then the darker prints around the outside. I do like order in my quilts!!

The sun was shining and the lawn recently mown, so I couldn’t resist another quilt photo shoot out by the pond 🙂
Some tips if you decide to make your own Road to Jarbo pattern:
- Think about the directions of your prints and plan your placement BEFORE cutting. I printed out a copy of the layout and coloured it in with the various prints in the correct place. Well worth the extra time!
- I didn’t have a 30 degree triangle ruler, so I used the 30 degree lines on the corners of my new Lori Holt cutting mat (which I love by the way!). This made cutting those angles much easier.
- Make sure you are cutting the angles on the correct end of the directional prints. Ask me why this tip made it to the blog post…. 🙂
- Take your time sewing the angles – making sure that you offset the coloured pieces 1/4″ so that when you iron the seam it all lines up. And yes, the first one I did, I totally wasn’t thinking about this and it got unpicked….

- A large design board (thanks again Lori Holt!) is another useful tool when sewing up each block. It makes sure that you have the various colours in the correct places and you don’t sew them together the wrong way.
- Mark a second line 1/2″ away from diagonal line on the background pieces in the four corners of the large piece. This way you get some bonus HSTs for another project.
I enjoyed making this quilt; it is reasonably quick and easy to put together. And I am in LOVE with Heartland fabrics… I have a few bits left over and I am already planning another little project.

So go and get a copy of the Road to Jarbo pattern from Moira at Quilt Talking (well, your local quilt shop) so you can showcase some of your own gorgeous fabric.
This make was part of my #FAL2016 for @finishalong