I have been participating in the Bee Hive 2016 on Instagram in the #beehiveswarmraylee group.
It has been fun so far… there have been some great blocks


and my first attempt at piecing curves

which was fun but boy did it take a long time to get a block that was the right size and the curves all matched up!
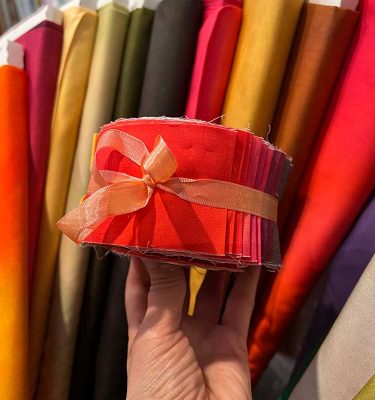
May is my month to be Queen Bee and I have decided to go with the Homebase block in reds, blacks and creams.
I have found a few of the tutorials a bit light on information and piecing instructions, so I thought for my fellow worker bees, I would post some more detailed instructions specifically relating to the colours that I want in my blocks!
So here is what my Homebase block is going to look like when multiple blocks are put together. There will be much more variation of reds (and the blacks) than this picture can show. I think it is going to be very striking!!

Here is what my test block looks like when it is repeated.

So I have labelled the different colours. I think at least 2 different reds and two different blacks with the same cream low volume background. But feel free to use four different reds and/or four different blacks if you have them and you want to!

As I am using a cream low volume background, could you please not use any red or black patterns that have white in them? I don’t want them to stand out against the creamy backgrounds. If you have any questions as to your fabric selections just contact me on IG (@anneboundy) or via the comments section below 🙂

Cutting Instructions:
Red A :
2 – 2.5″ squares
1 – 5″ x 5″; cut in half diagonally
Red B :
2 – 2.5″ squares
1 – 5″ x 5″; cut in half diagonally
Black E :
2 – 2.5″ x 2.5″ squares
2 – 2.5″ x 4.5″ rectangles
Black F :
2 – 2.5″ x 2.5″ squares
2 – 2.5″ x 4.5″ rectangles
Cream Low Volume G :
8 – 2.5″ x 4.5″ rectangles
Piecing Instructions for using 2 Reds and 2 Blacks
Step 1: Sew a Red A and a Black F square together. Press towards the darker print (or open whichever you are comfortable with). Make 2.

Step 2: Sew a Black F rectangle to your A and F squares, making sure the Black F makes an L shape. Make 2.

Step 3: Sew the background G rectangle to the block from step 2. Note that where the pink dot is will be where we want the extra 1/4″ to come out from the point, so when my G cutting wasn’t quite perfect, I made sure any extra millimetres was down that end 🙂 Make 2.

Step 4: Repeat steps 1, 2 and 3 using Red B, Black E and background G. Make 2.

Step 5: Taking your four corner blocks, sew the remaining background G rectangles to the other black side of the blocks. You will see the slight cross over where the two cream G pieces meet.


Step 6: On the 45 degree angle of each of your 4 corner blocks, trim 1/4″ away from corner of the black prints – the black line in the diagram below.

I turned my block on point and lined up the middle along the line. And then used my ruler to add the extra 1/4″ above the black point, made sure it was straight across the block and then cut.


Step 7. Place the alternate Red triangle (ie if Red A square is in the corner, then place Red B triangle) right sides together with corner unit, aligning it in the middle of the line. I finger pressed in the middle of the triangle so that I could get it nicely in the middle and I also made sure that the point of the triangle was in line with the other points. Sew 1/4″ from the edge. Press the seam towards the triangle.

Here is my finished corner block (and yes, this corner block will be the top left hand of my finished block, as I do like my text to be the right way up!!)

Step 8. Arrange the corner units to form the centre diamond. Sew the blocks into rows and then sew the rows together.
And thank you for taking the time to make bee blocks for me!