
I have been seeing lots of log cabin blocks on Instagram lately… the scrappy Bonnie & Camille fabric log cabin block swap just looked divine!
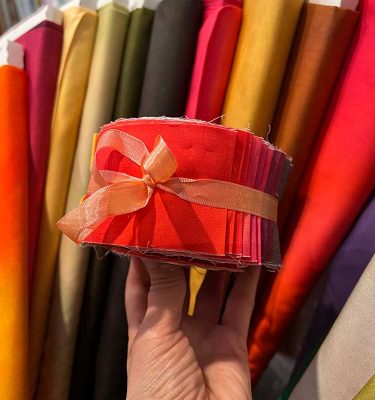
So I have been hankering to play with my B&C scraps and log cabins.
And then I saw a curved log cabin block…. OMG…. I loved it! I can’t remember whose feed I saw it on first, but I found a Missouri Star Quilt Company youtube tutorial from ages ago that has something like I wanted to try. And Jenny Doan has just done a reboot of that tutorial this last weekend!
I changed it a little bit (typical me!) so that each quarter block finishes at 11.5″ so when you put four of them together to get the ‘circle’ it is 22.5″ square block. Great big beautiful blocks!
The ‘trick’ to making it look a bit like a circle is to use different width strips in your log cabin.
To make it easy for myself, for the colours I used a 2.5″ wide strip (great way to use up left over jelly roll strips!) and the background I used 1.5″ wide strips in low volume.

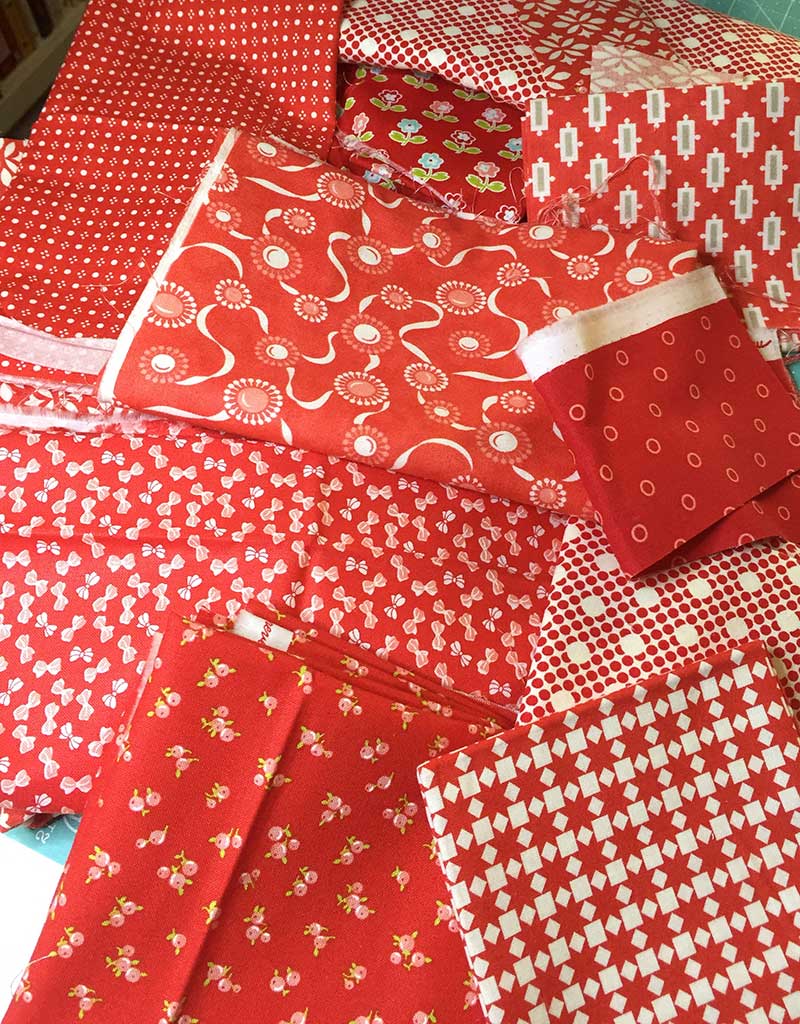
I had a ball going through all my Bonnie and Camille red scraps and cutting the strips required. Seriously, the choosing of fabrics was the most time consuming part of this… the sewing is pretty easy!
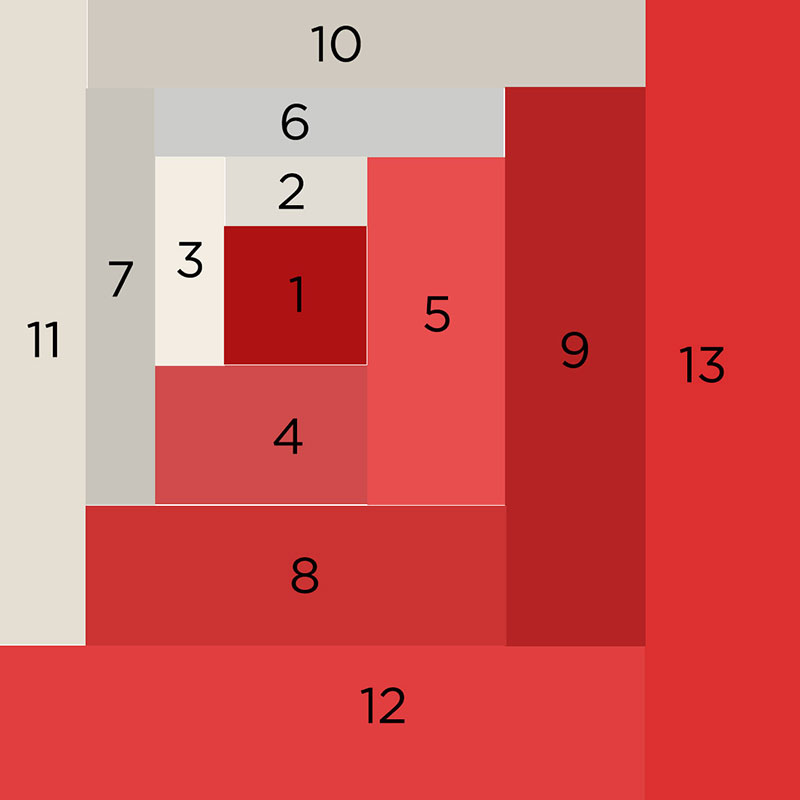
Here are the cutting instructions I used that relate to the numbers in the diagram above for one quarter of the full block. So to make a full block you will need to cut FOUR of each of these sizes.
- 2.5” square in colour
- 2.5” x 1.5” in background
- 1.5” x 3.5” in background
- 3.5” x 2.5” in colour
- 2.5” x 5.5” in colour
- 5.5” x 1.5” in background
- 1.5” x 6.5” in background
- 6.5” x 2.5” in colour
- 2.5” x 8.5” in colour
- 8.5” x 1.5” in background
- 1.5” x 9.5” in background
- 9.5” x 2.5” in colour
- 2.5” x 11.5” in colour
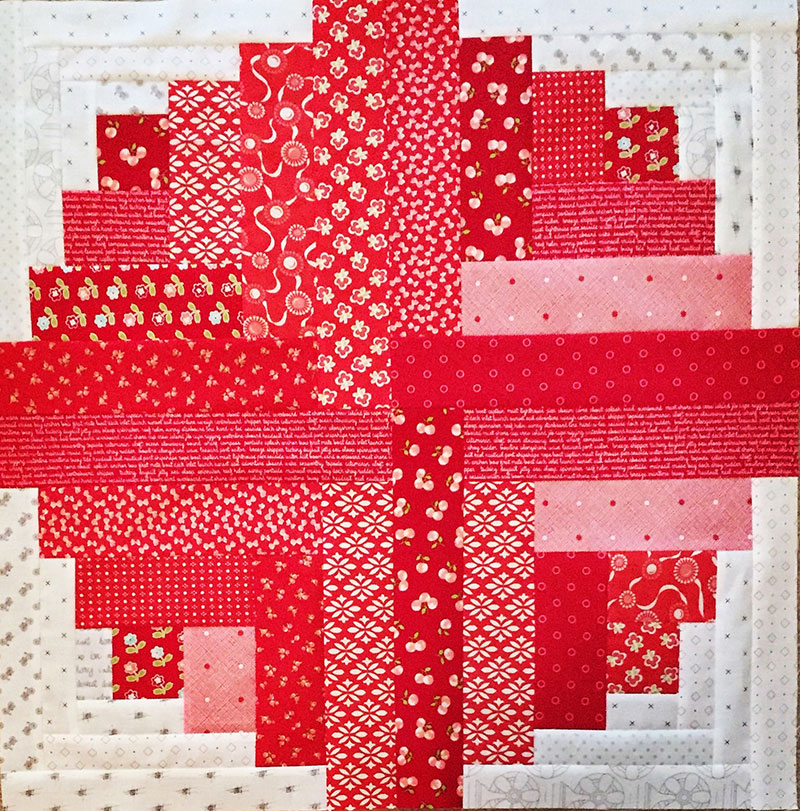
And this is what it looks like when you sew your four quarters together into the full block. Suddenly the ‘circle’ appears and it looks fantastic!
Cannot wait to make more of them – enough for a whole quilt back to go with one of my double sided quilts 🙂
I have also worked out a smaller version too so that the finished block isn’t quite so huge. Great for smaller projects and ‘fillers’ in a sampler quilt perhaps?
- 1.5″ square in colour
- 1.5″ x 1″ in background
- 1″ x 2″ in background
- 2″ x 1.5″ in colour
- 1.5″ x 3″ in colour
- 3″ x 1″ in background
- 1″ x 3.5″ in background
- 3.5″ x 1.5″ in colour
- 1.5″ x 4.5″ in colour
- 4.5″ x 1″ in background
- 1″ x 5″ in background
- 5″ x 1.5″ in colour
- 1.5″ x 6″ in colour
This makes a 6″ square block and you will need to make FOUR of these to create the curved log cabin block.
This will be a 11.5″ unfinished curved log cabin block.
And yes, these are some pretty small pieces to be sewing with! Pressing between each strip is important- just take your time 🙂
This tutorial has been part of my Scrappy July month on @52Quilters over on Instagram. Myself and three other quilters are showcasing how we manage scraps, what we actually define ‘scraps’ as and how we use them in our projects.


Yes! I love the variations that can be made with log cabin blocks simply by altering the size of the logs. Lovely tutorial!
Thanks Yvonne – your tutorial festival recently encouraged me to write up more tutorial posts!
Thanks Anne!
I’m so glad i found you here as well as your IG @anneboundy 💞. I love this block too!! I participated in the B&C log cabin swap an this is right up my alley!!
Kim 💕
Oh that B&C log cabin swap had me a bit green with envy… the quilts that came out of it were AWESOME! And welcome to the blog 🙂
Does anyone know how to draw a curvy log cabin onto foundation paper?
You could use something like EQ8 to mock it up and then be able to print out the foundation layout from there. Alternatively good old pencil and paper 🙂 The Fat Quarter Shop does have log cabin foundation paper pads ( my affiliate link to their page of pads https://shrsl.com/4p30d ), however not for these curved log cabins.