
I love using handmade bags whilst shopping and not just for the groceries either! The post office, chemist, clothes shopping… pretty much everywhere!
And these have worked out to the be the perfect size for the Hand Over Bags for our Charity Sewing for Shannon’s Bridge for 2019 – 2020! I have created a PDF of this tutorial for download.
I looked at a LOT of tutorials and patterns for unlined grocery bags but realised I wanted one that could be easily made up from Fat Quarters!. So I decided to make up one of my own instead 🙂 As you do.
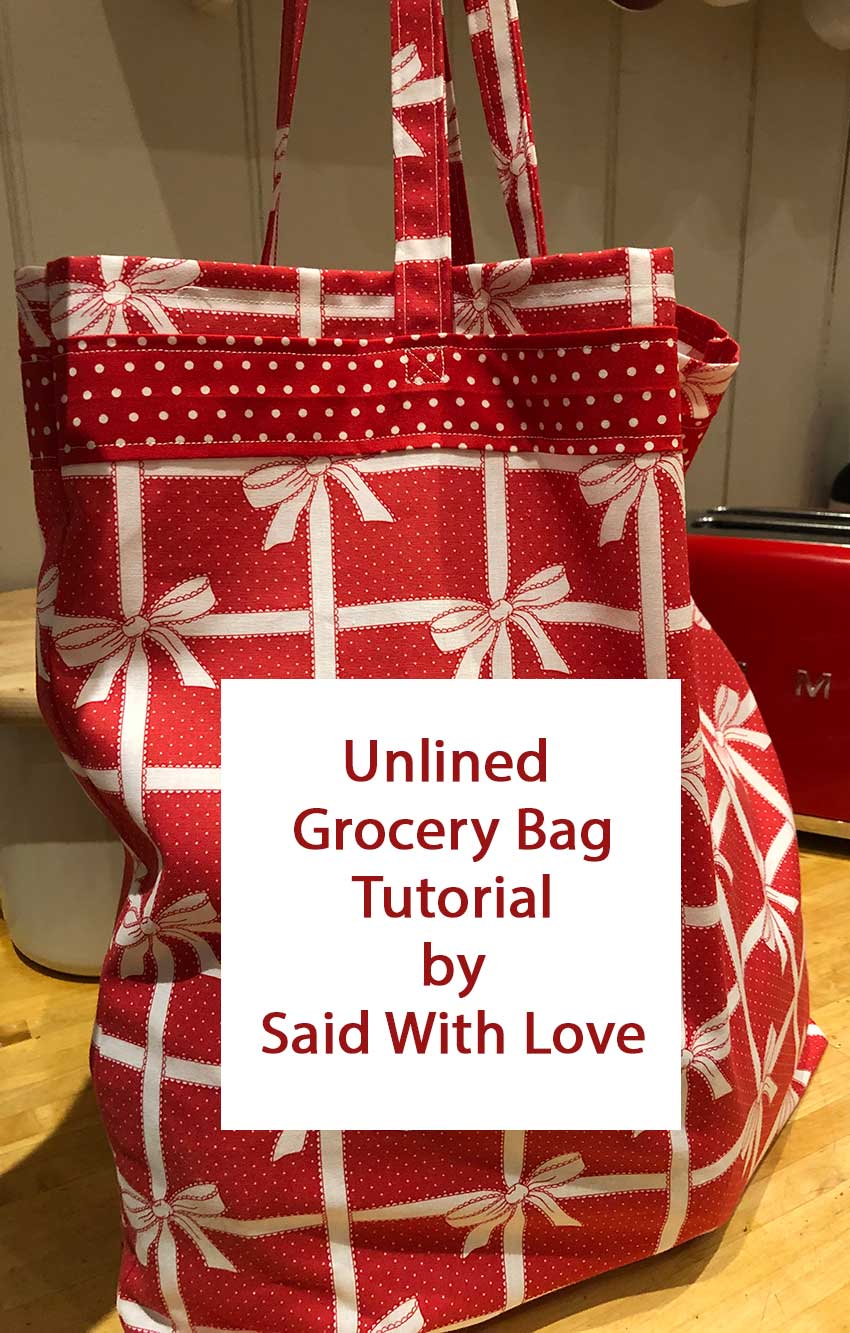
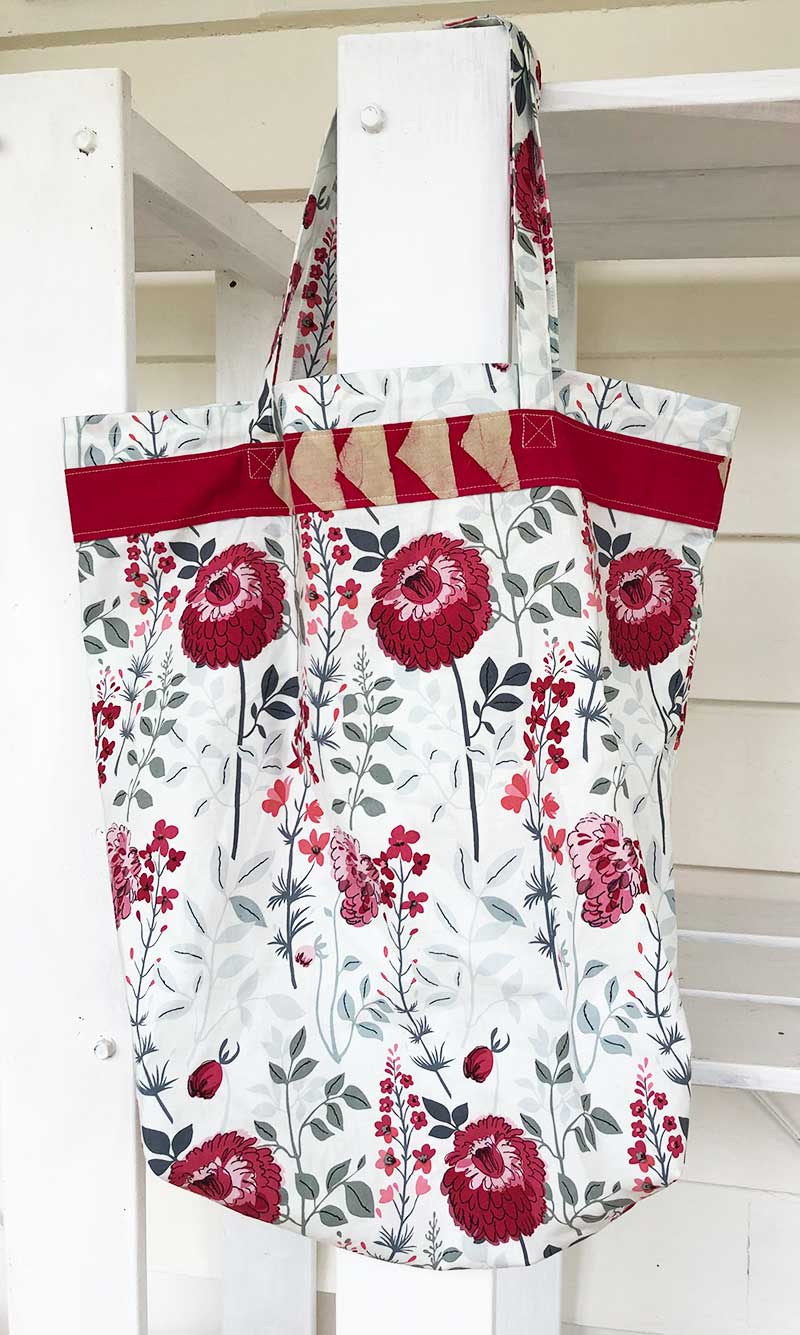
And this is what I came up with. An unlined grocery bag (but with finished seams inside) with handles and a contrasting strip across the top. A bag that can be finished in about an hour or so. And uses up fabric in your stash!
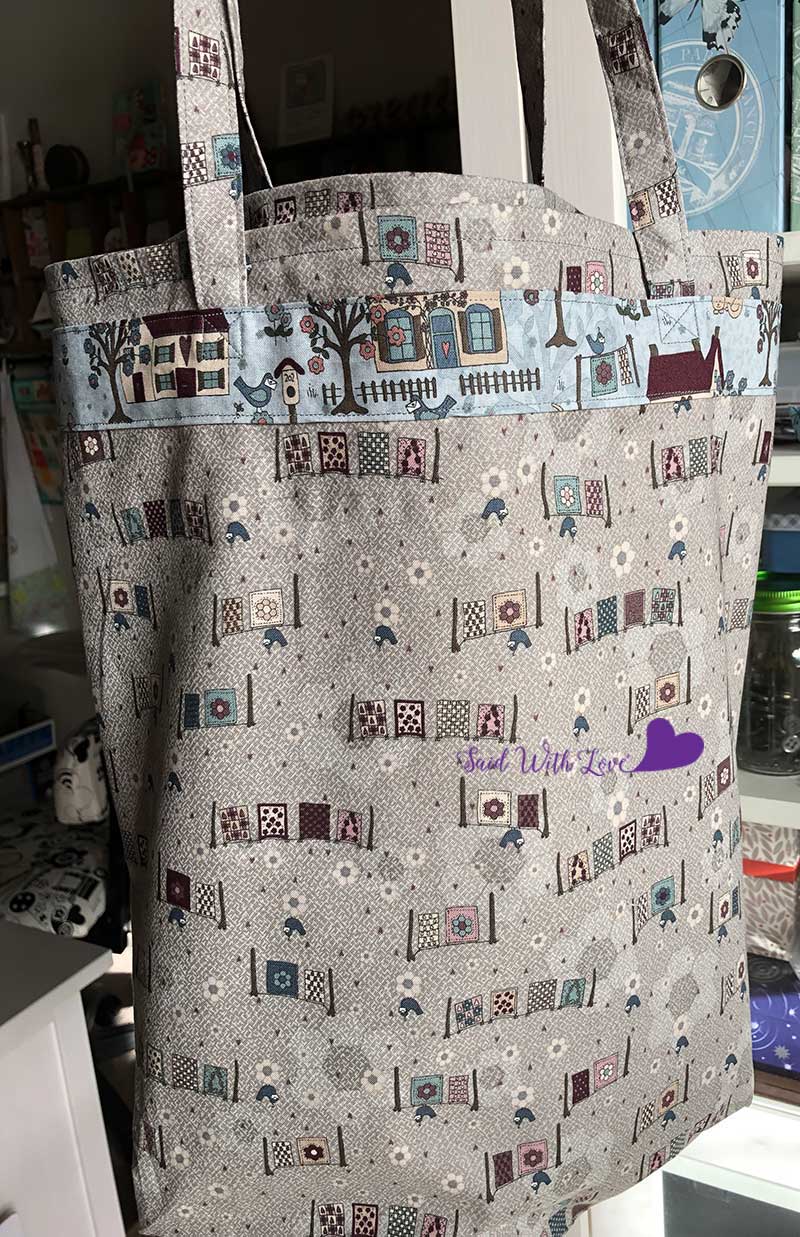
I have made quite a few of them over the past couple of weeks… they are easy to make and look really good… and fold/scrunch up nicely into your handbag so you always have one with you!
Materials
2 Fat Quarters of fabric (matching is good, but you can have different fabrics on each side of your bag!)
2 strips 3″ x 18″ for the contrasting strip across the top
Thread, sewing machine and about an hour or so of time!
Instructions
Press your two FQs and then lay them on top of each other (both right sides facing up) and line up the selvedges and then trim the selvedges off.
Then on the opposite side from the selvedges, cut off a strip 3″ wide (through both layers of fabric).

This will leave you with two pieces 18″ x 18″ (or 18″ x 20″ if using metric FQs) and two pieces 3″ x 18″ (or 20″).
The two smaller pieces are for your straps, the larger two pieces are the body of your bag.
Make the straps
Press the 3″ x 18″ (or 20″) in half length ways. Open back up and then press each side into the middle fold. Press well. Then fold again on your first fold. You should have a 18″ (or 20″) strap that is about 3/4″ wide.

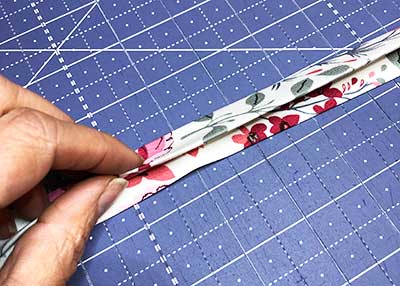
Sew about 1/8th inch away from the open edge and then back up the other side 1/8th inch away from the folded side.

Repeat for the second strap.
Start the bag
Take the two larger pieces of your Fat Quarters. Decide which is the top of your bag. Fold that edge over (to the wrong side) 1/2″. Press. Then fold it over another 1/2″ and press.
Take to your sewing machine. I sew from the right side of the bag, about 3/8th inch from the top. This will ensure it catches the seam underneath.

You can sew it from the other side and get a bit closer to the edge of your seam, but as this sewing will show from the front of the bag, I wanted to make sure it was even from that view.
This will give you a neat top of your bag ready for the adding of your straps.
Repeat for the other side of your bag.
Attach the straps
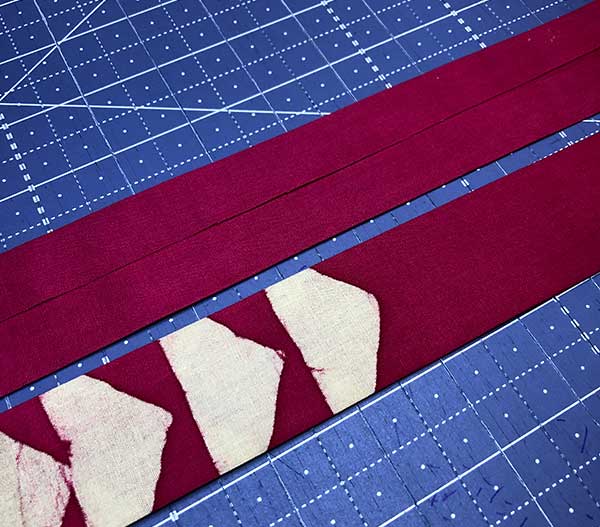
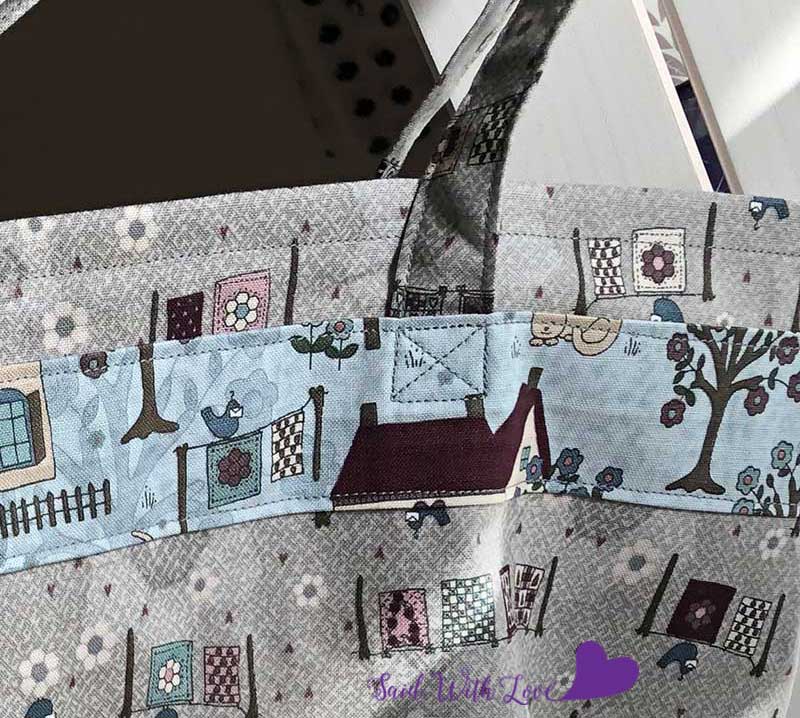
Take your contrasting pieces of fabric and fold in half length ways and press LIGHTLY. Open back up and press each side in to the fold. Press well. Leave like this. (picture below is of the two contrasting strips one from the back view and one from the front view. And yes, from a different bag!).
Place one side of your bag, right side facing up. Find the middle of the top of your bag (approximately 9″) and mark with a pin.
Measure out 4″ from either side of that pin and place pins.

Take one of your straps and place the it so that the side of the strap is on the inside of that outer pin and the strap end is about 1 & 1/2″ down onto the bag. Pin or clip in place. Repeat for the other side of the strap.
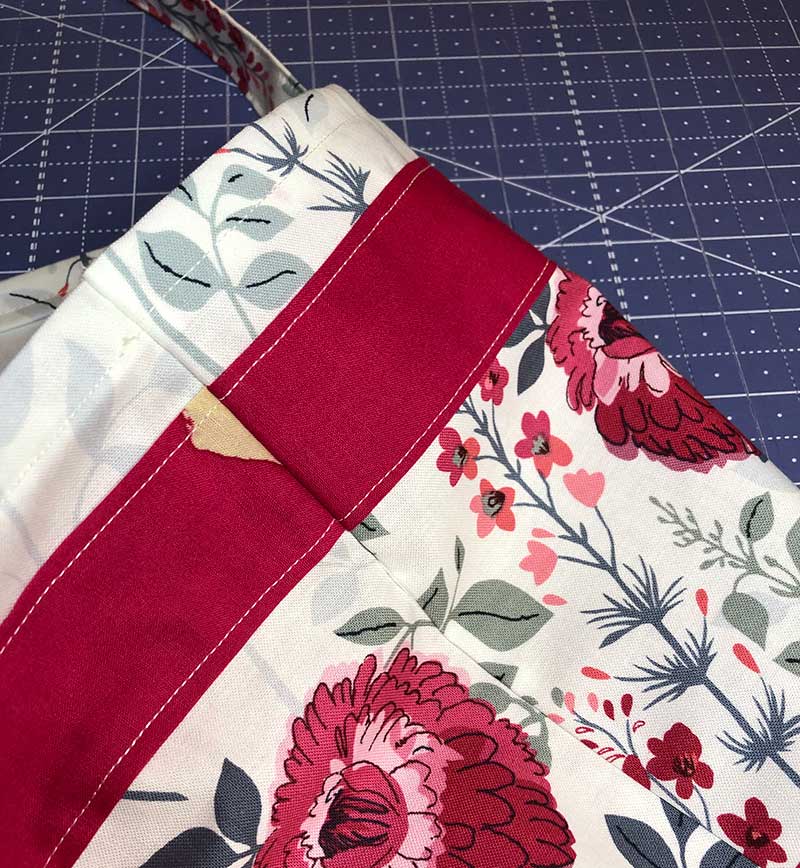
Take your contrasting piece of fabric and place it evenly 1″ down from the top of your bag. This will cover the strap ends and will meet or go over the sides of your bag.
Top stitch about 1/8″ away from the top of the coordinating strip across the bag and then across the bottom of the coordinating strip.
Then sew a square with diagonals across the coordinating strip where the strap end is. This will ensure it has extra strength when being carried.
Repeat with the other side of your bag.
To French Seam or Not….?
If you don’t mind unfinished seams on the inside of the bag you can literally now put the two sides of your bag, right sides together and sew a 1/2″ seam all the way around. This is a very simple (and VERY quick) bag.
You could also box out the corners of the bag (similar to what is explained below) to give a ‘bottom’ to your bag.
However…. if you would like your bag to have finished seams inside (French Seams)… then follow these few more steps and you will have a super looking bag; inside and out!
If you are making this bag for the Charity Sewing for Shannon’s Bridge, it would be great if you could do the french seams 🙂
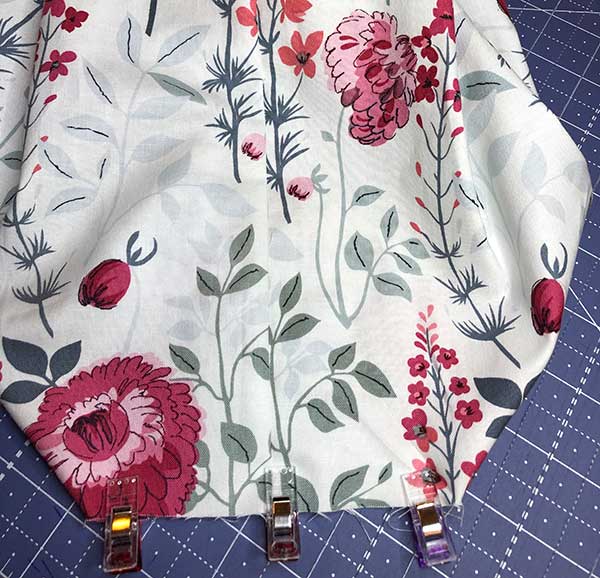
Put the two sides of your bag together… WRONG sides together! So your right sides will be showing on the outside. Yes, I know, these seems strange. Trust me 🙂 Pin along the sides and bottom, making sure you match up where your contrasting strips meet on the sides.
Boxing the Corners
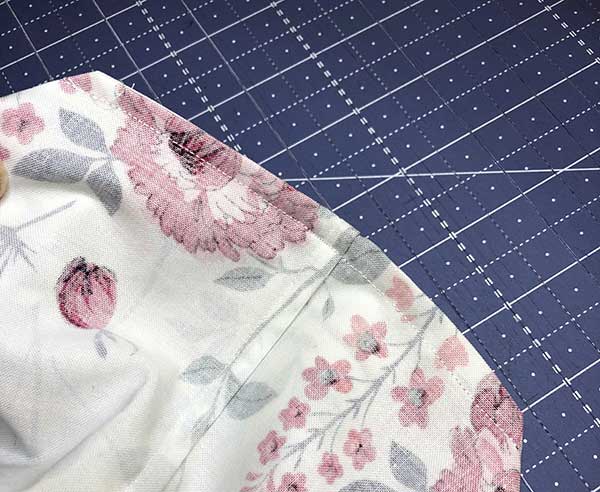
Before we get too far into this, let’s cut out those bottom corners. With your bag all pinned laying flat on your cutting table, measure a 2″ square from both bottom corners. Cut these corners out. (and yes, the only picture I took of this part I had it turned the wrong way! doh!)

Now we can get back to sewing up those side and bottom seams! Make sure your right sides are on the outside!
Sew a 1/8″ seam (yes, pretty tiny!) along both sides and across the bottom. Trim any loose threads.

Press the seam to one side. Then turn your bag inside out (so now the right sides are together) and press the side and bottom seams well.
Then sew a 1/4″ seam along both sides and the bottom. This will enclose your first little seam and it will look pretty darn good when you are finished! Trim any loose threads that may have been caught up in the seam.

Press. Make your life a little easier and do the side seam in a different direction to the bottom seam.
Now, turn your bag back so the right side is out so you can see how wonderful your side and bottom seams are looking!
Continue to Box the Corners
Match up the side and bottom seam (helps if the seams are folded different ways so they nest). Sew a 1/8″ seam. Press and trim.
Turn the bag the other way so your RIGHT sides are now together. Sew a 1/4″ seam to enclose your little seam. Trim and press.

Turn your bag in the correct way and your inside seams are now all beautifully enclosed (those French really do know a thing or two!) and your lined bag is all ready to use!
Enjoy!
I would love to see your versions on Instagram or Facebook with the hashtag #unlinedgrocerybag or for the charity sewing #handoverbag and #swlcharitysewing


